Not so simple Simplex.
Introduction.
Many, many moons ago when I first entered the hobby there were very few suppliers to the hobby. Lasers cutters only featured in James Bond movies and generally if you wanted it you made it yourself. One cottage industry was Saltford Model who offered a small range of loco kits. I say kits because the ‘all in the box’ concept had not yet appeared. I ordered a Simplex kit from them, what arrived was a small collection of white metal parts and a rudimentary drawing of the finished loco. The white metal parts included the not so round wheels, buffer blocks, sand boxes, gearbox end, starting handle bracket and the radiator cap. The rest of the loco was to be made with plasticard provided by the builder. I built the kit as planned but discarded the wheels in favour of the Binnie skip replacement wheels supplied by Brandbright. Gearing came from an old Tri-ang Hornby ‘Nellie’ loco which was added to the wheels by pushing off a wheel and epoxy gluing the worm wheel onto the axle. Years later I fitted rechargeable batteries and charging point but the loco ran as built. As my loco fleet expanded the Simplex got pushed further back on the shelf, the plasticard had become brittle and the un-bushed plastic chassis was definitely suffering. With the resurgence in interest of heritage models by the association, I looked at the Simplex; surely these simple kits are part of the heritage of our hobby, something needed doing.
To get an exact scale model of a Simplex I could have bought one of the IP Engineering kits. I wanted to celebrate the Saltford kit and use the castings but display them in a more fitting manner. My research (Railway Modeller June 1975 and Motor Rail Ltd by Alan Keef) revealed that although the Simplex cab/bonnet/radiator layout is universal no two Simplex’s appear to be the same! The castings seem to be generic so I sketched a basic drawing from the information I had based on a 20HP loco and included features I wanted.
The Chassis.
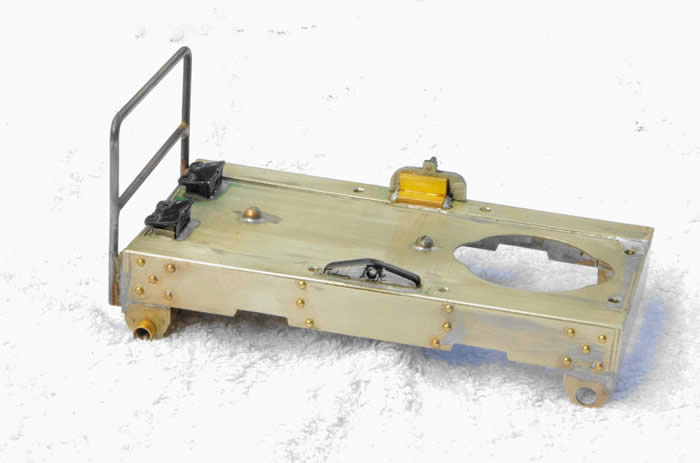
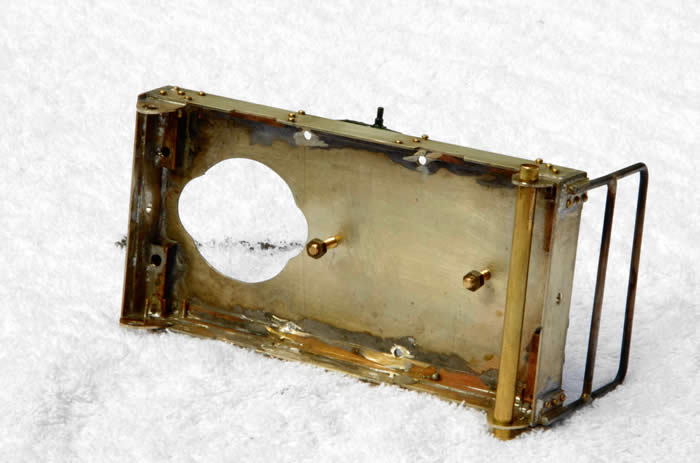
I retained the motor, gearing and wheels but the old chassis went. The new chassis consists of a piece of mild steel rectangular bar with two brass sides bolted to the edge of the steel bar. The brass sides are shaped to hide them from view and fitted with axle bushes. The motor had two brackets soldered to the can for mounting it to the mild steel bar which was drilled for the worm and mounting screws. Later if found necessary Delrin sprockets and chain can be fitted to give four-wheel drive.
Footplate.
The castings are for the plate frame type of Simplex, so a piece of nickel silver was sheared to form the footplate. Added to this were overlays to give the lip to the footplate edge, more pieces were sheared to produce the side plates and buffer beams. Albion metals angle and box sections were used to provide stiffness at the corners and joints. The lot was soldered using high temperature solder which would allow lower temperature solder to be used to add detail. De-railer brackets and tube were added as were rivet details. A large handrail I’d made for the old model but not fitted was soldered to the front buffer beam and rivets added for strength. The sandbox, gearbox and starter handle bracket casting were added next and, being white metal, needed care. I heated the location of the footboard and tinned with Carrs 70-degree solder. Whilst the solder was still fluid I placed the prepared casting into the solder pool. The heat in the surrounding nickel silver kept the solder fluid to ensure adhesion and avoid directly heating the white metal.
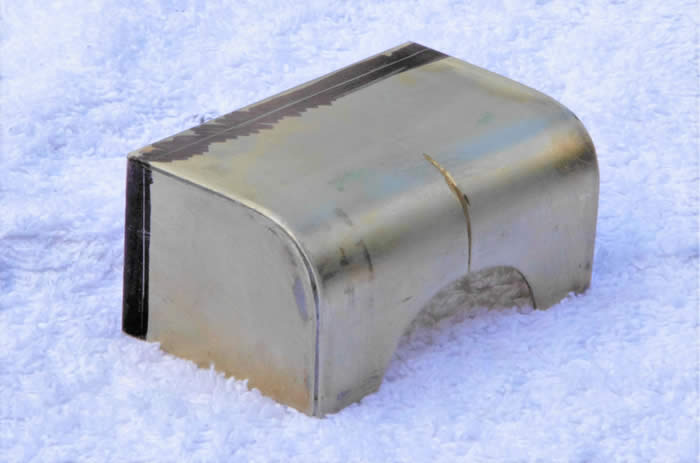
Cab and Bonnet.
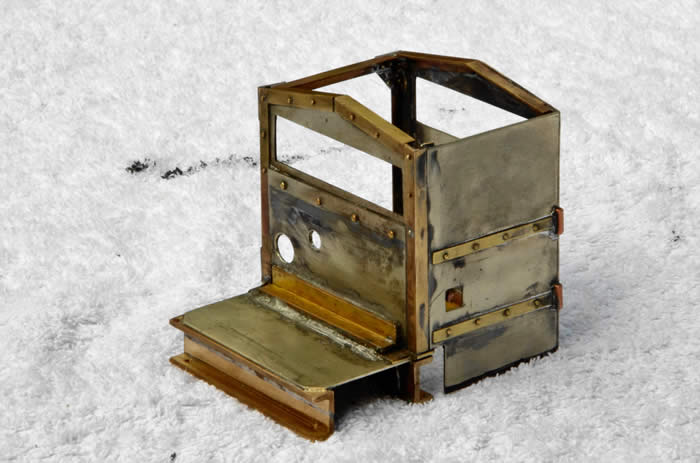
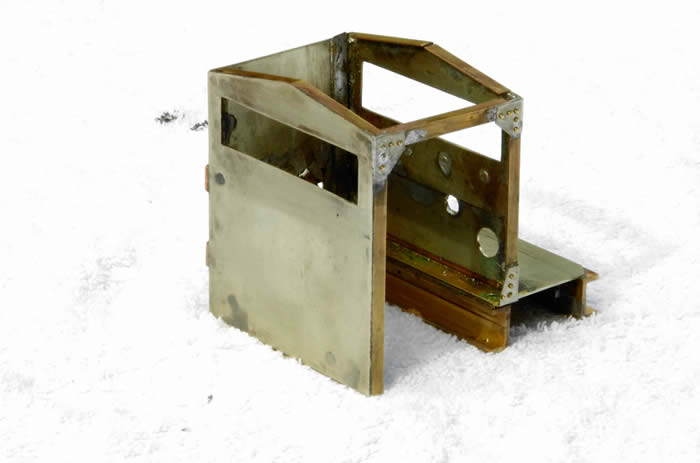
I like to build models in units to ease painting and future maintenance. Originally, I planned to build the cab and bonnet as separate assemblies but as the cab mounts to the bonnet frame I changed this to a single unit. Construction is again nickel silver sheet sheared and soldered using brass angle for the corners and for stiffening. Rivet and strip was added to give detail. The distinctive engine bearers were made from two pieces of heavy gauge angle soldered edge to edge with a stiffener. These with an angle in the cab back were drill and tapped to mount the unit to the footplate. The bonnet sides were shaped and this shape was used to bend a pair of square section stiffeners to shape. An over long piece of sheet was sheared to width and the bonnet radius formed with a piece of copper tube in the vice jaws. The lot was clamped and soldered, trimmed to length, the internal stiffener allowed the corner radius to be filed on the bonnet without weakening the joint. The distinctive cut-out in the front of the bonnet was formed with a drum sander in the Dremel.
Radiator.
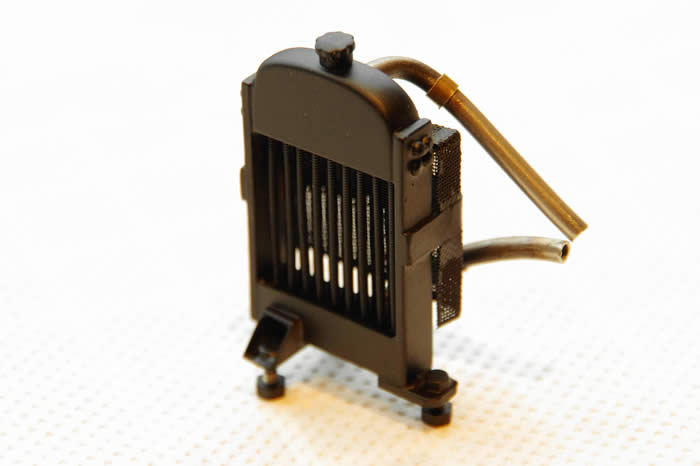
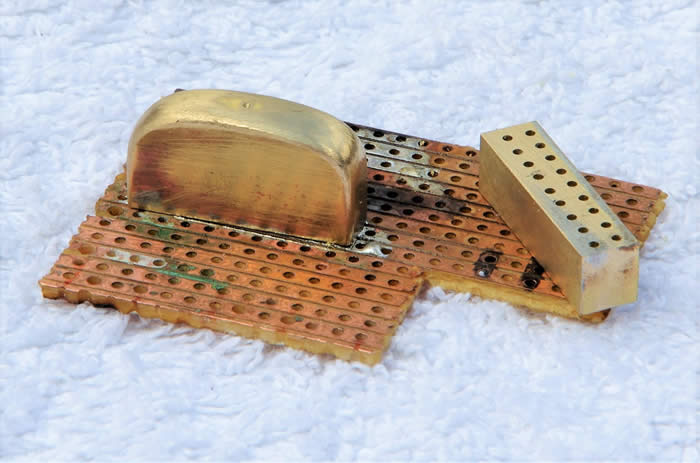
The transverse radiator is a prominent feature on a Simplex. The top and bottom headers were filed up from solid brass and, to aid drilling them for the radiator elements, they were soldered to copper clad Vero board. I drilled these before obtaining bass guitar strings to represent the Wignell element tubes so the spacing is a little too wide; the bottom header is through drilled to allow insertion of the strings. To save making a fan a mesh guard was made and soldered onto the back of the radiator. Brackets were made for the mountings to these 8ba screws were soldered to mount the radiator to the footboard.
Finishing off.
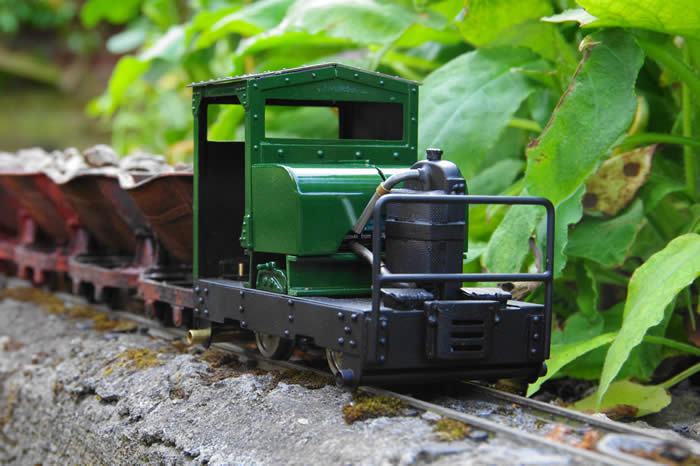
The same electrics were reused. The charging point and on/off isolator switch were mounted inside the cab with the batteries under the bonnet. The loco is single speed so a simple forward/off/reverse switch was mounted in a discrete but accessible position under the bonnet. The assemblies were thoroughly cleaned and degreased using hot water and scrubbed with Bar Keeper Friend. Once dry they were etch primed and sprayed with Halfords satin black or Brookland Green as appropriate.
Tony Wright June 2018