Simple Jigs and Fixtures for making rolling stock and fences
by Tony Wright
Introduction.
When constructing wooden rolling stock I find the use of basic jigs and fixtures helpful during the building process, this is particularly so when I build multiple items such as a rake of wagons. My preferred method of construction is to use the same methods and materials used on the real railway, so wood should be wood and metal should be metal. With wood bodies I use individual planks to form the bodies. I personally don’t like the look of plywood and the time taken to build with individual planks is similar to the time taken scribing planking on the ply.
The jigs I use are used to hold cut lengths of wood in the correct position while they are glued. They are simply made, usually from scrap, and the time take to build them is amply repaid during the vehicle construction. The jig consists of a base, usually a MDF offcut, whatever you use it must be flat and strong enough to take any clamping forces. Stop blocks are used to locate the wooden strips and therefore their position on the base is critical, time spent is ensuring accuracy of the stop block location is key. The stop blocks must be big enough to allow clamps to hold the wood strips but small enough not to interfere with any gluing process. Short pieces of 12x6 stripwood make good stop blocks. Lastly are the packers, these hold up the wood strips and prevent them becoming glued to the base, here coffee strirrers are ideal.
I use two methods of gluing dependent on the strength of the joint required and its visibility. Zap-a-gap super glues are useful as the wood sections can be fully assembled in the jig and the glue flooded into the joint. The main disadvantage of this is the glue can stain the wood affecting final finish on the vehicle. The other gluing method is to use PVA type glues which need applying before the joints are set but can be cleaned up with a damp kitchen towel. I find the super glued joints brittle but after removal from the jig the joint will be further supported so high strength in the joint isn’t required, just enough to allow the piece to be removed and handled.
So let’s have a look at few builds I have undertaken recently to show my technique.
Abertillery Workman Coaches.
I came across a photograph of these coaches used to ferry workmen on dam construction in a book about Manning Wardle Locomotives. The simple construction with the end panels clad in distinctive diagonal planking and the heavy internal cross brace to give the coach strength appealed. I decided to build six of these coaches and used two jigs, one for the end panels and one for the cross bracing. The end panel framing would be flimsy until the diagonal planking gave strength, so the jig held the 3x3 square wood in correct position as the planking was added. The 3x3 is cut so as the fit is tight, the wood self-holding position and not requiring clamping. The planking is added to the 3x3 before the panel is removed from the jig. The cross bracing needed to be square and the ends parallel to ensure the coach was to be square and true. To achieve this the stop blocks locating the wood were set with a try square and measured with Vernier calipers. The bracing was built up in four laminations and give the bracing its strength.
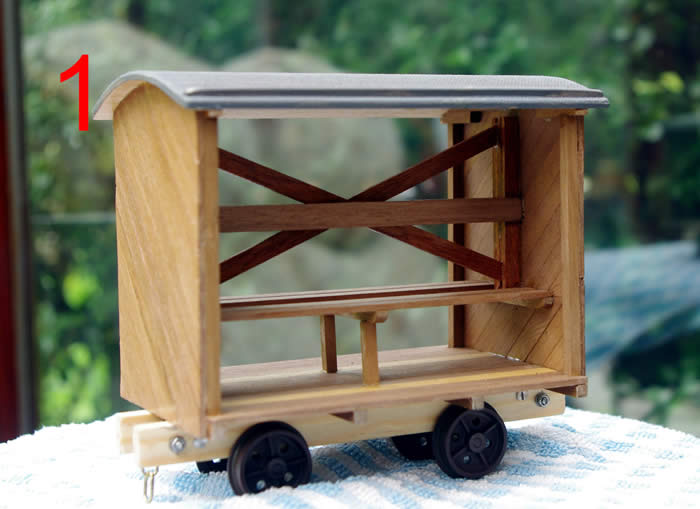
Photo 1 shows a completed coach, the ends are glued to the cross bracing. Adding the roof, seat and floor planks makes for a strong box.

Photo 2 shows the end frame jig with its arrangement of stop blocks and packers.
Open Veranda Brake Vans
Two of these vans were required for my railway and a third was built as a present. Firstly, I made a jig to assemble the bufferbeam and solebar sections. I have standardised on two chassis lengths for my wagons and vans, the jig is made to produce both lengths. Secondly, a jig was made to produce the external framing on the van sides which were again clad with planking. Again accuracy in building the jig ensures when the vans were built up the sides are square and parallel.
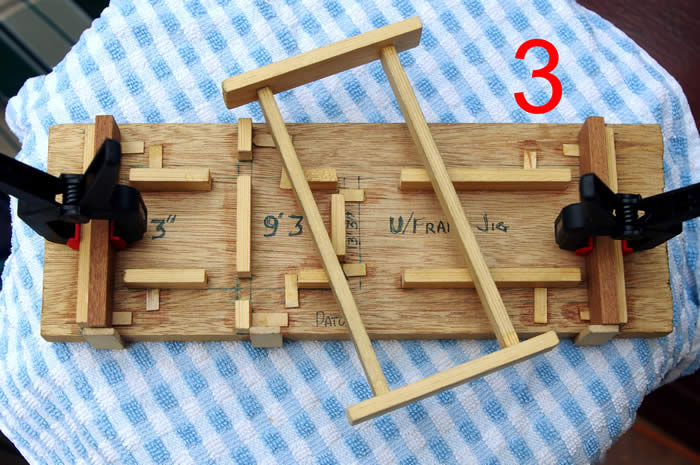
Photo 3 shows the chassis jig which produces the 13’3” and 9’3” chassis lengths. On top is a completed 9’3” chassis and in the jig are the bufferbeams clamped into position for a 13’3” chassis. This chassis has and additional cross piece at the mid-point, its stop block can be seen.
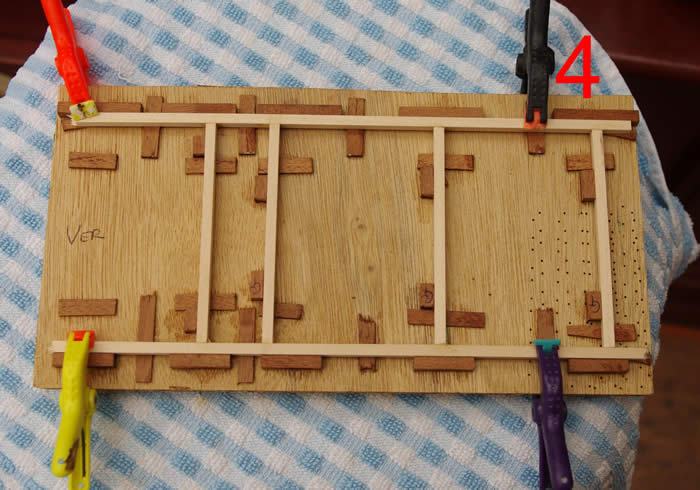
Photo 4 shows the framing jig with wood strips in position.
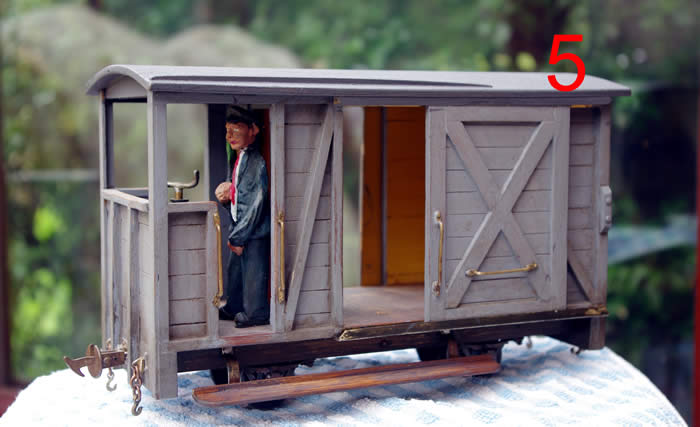
Photo 5 – shows a completed brake van.
Quarry Tub Wagons
As a small wagon a reasonable number of these were required to make up a train. I therefore commenced with a batch of ten. Two jigs were made, one to form the chassis/floor unit and one to make the end panels. The side planking is cut and glued between the assembled ends and floor.
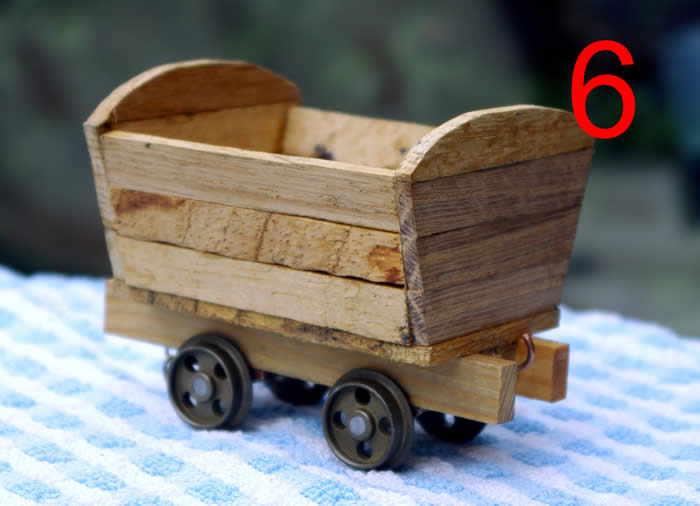
Photo 6 shows an assembled tub awaiting strapping and distressing.
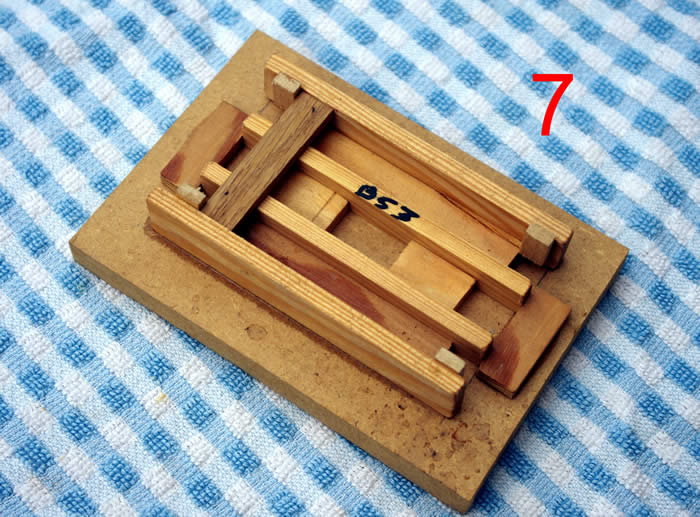
Photo 7 shows the chassis jig, the solebars (one marked B53) are held in place by four loose packing pieces between the fixed stop blocks on the outside. One plank has been positioned showing how they sit between the outer stop block and the end stop which set the floor length.
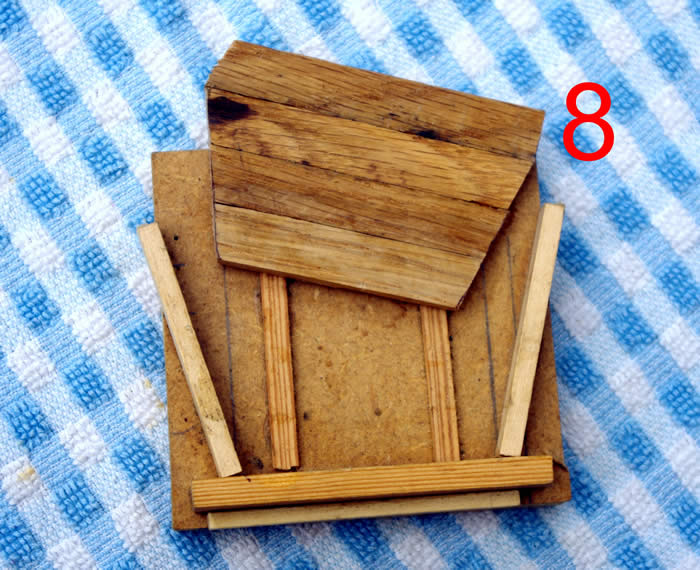
Photo 8 shows the end plank jig used to set the angle of the sides.
Fencing
I needed a length of fencing for station platforms. I had a stock of Hobbies 4x2 spruce which I decided to make into picket fencing. A jig was knocked up to make the panels.
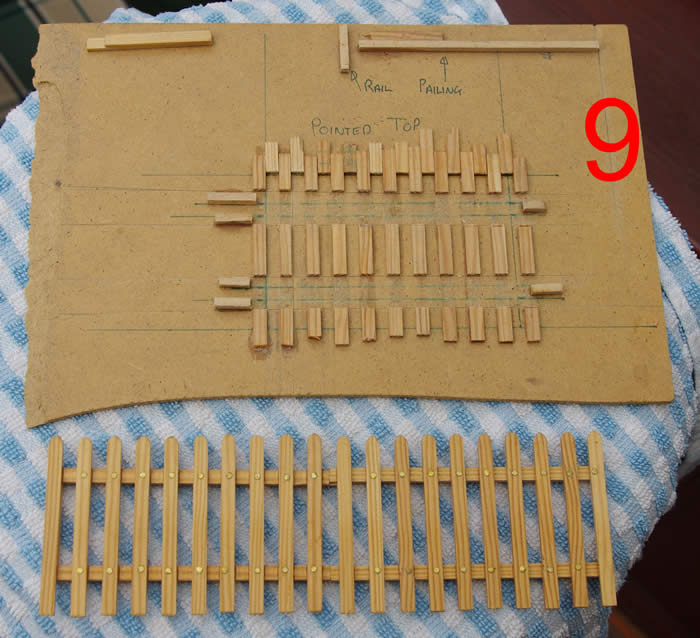
Photo 9 shows the fence panel jig. The upper edge includes the cutting to length jig for the styles and rails, also for the setting of the offset in the laminated rails which allow the panels to be joined.