Derek Round restoration of a three truck Shay
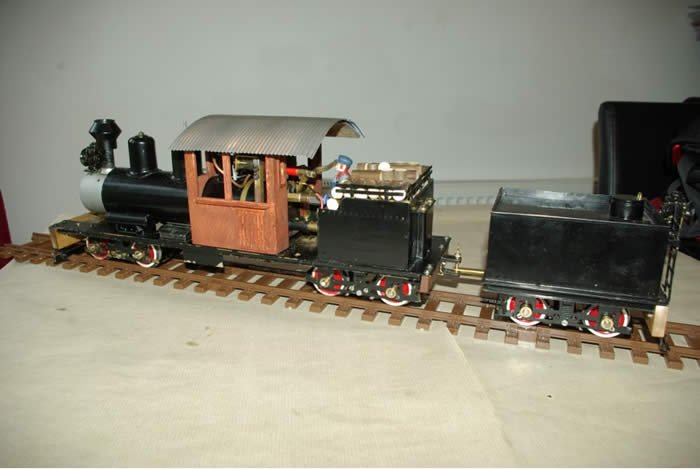
This is a Steamlines Shay that I acquired from the estate of the late John Orson. The loco appeared to have had much running and had accumulated much wear in everything that moved.
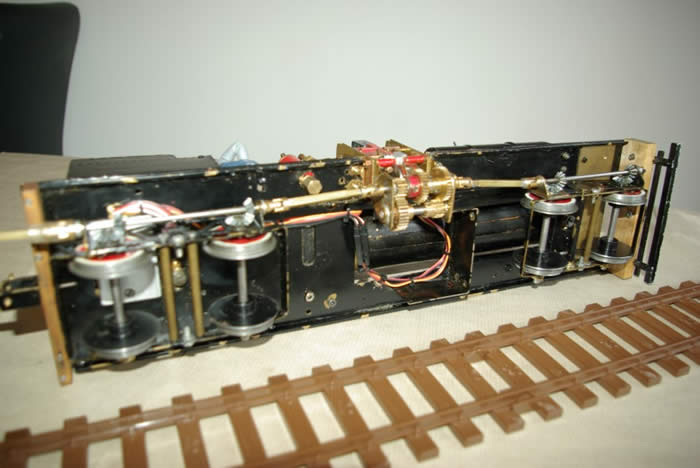
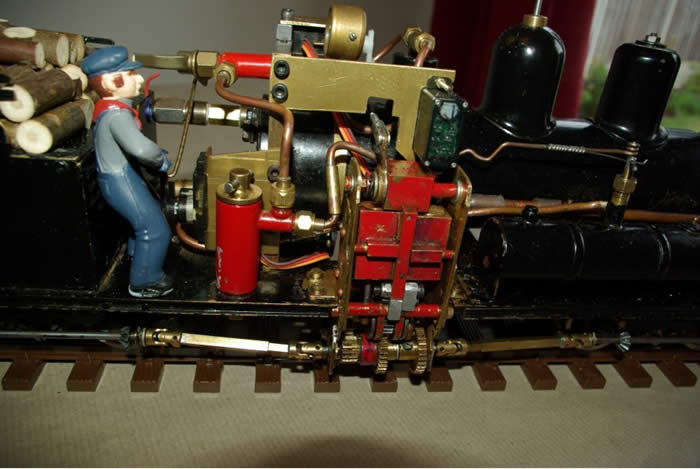
I started with the bogies and worked through all the problems one by one. The gears were useable, but there was much bearing wear and spacing wear that needed fixing. Also, they had one spacer that was directly under the centre pivot and that was quickly changed to two spacers, leaving a gap whereby I could directly access the centre pivot bolt. All the universal joints were worn out, as were the sliding joints in the prop-shafts. Ebay eventually provided ten (I had to do another Shay!) lovely universal joints, and the local model shop sourced the associated “slidey bits” to fix the prop-shafts.
The smokebox was an easy fix. It needed a thicker mounting sheet on the chassis, and a purpose made bracket. Job done! Another easy job was the coal load. A new base, painted black and the load made up and glued on piece by piece.
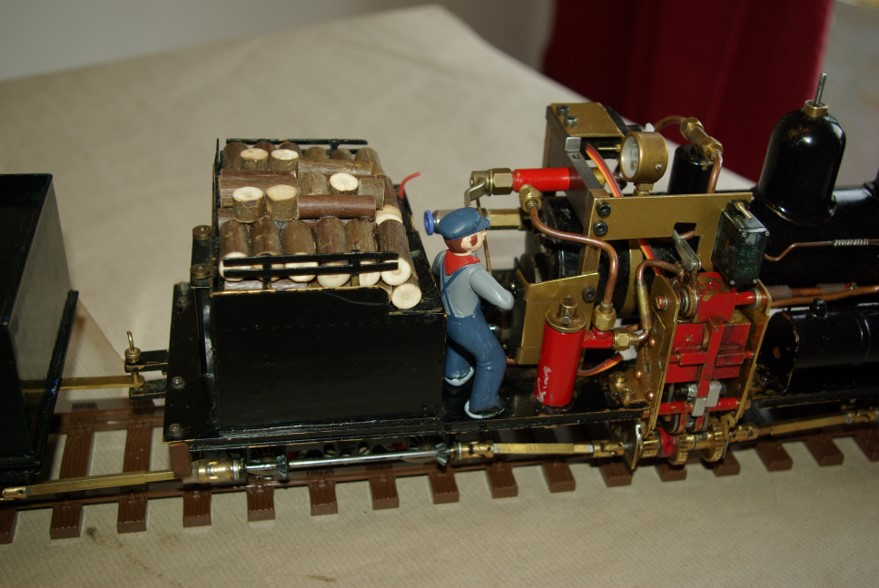
However, working out how to (neatly) get three servos (gas, regulator and reverser) into the cab, as you can see, took a bit of doing. Plenty of paper templates (for the platework) went into the bin, but it turned out alright in the end.
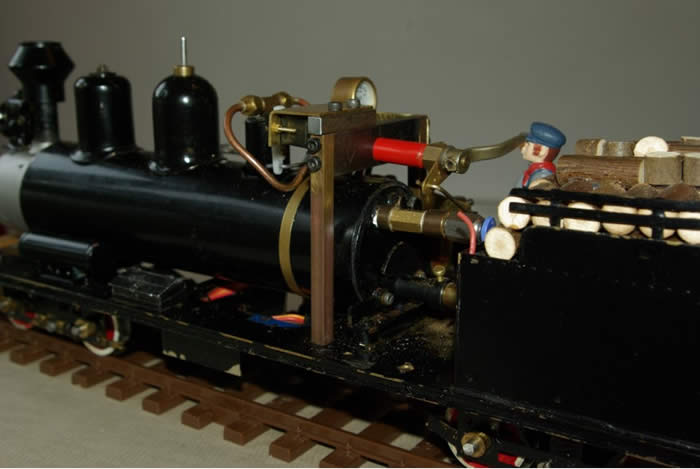
Next, I steamed the loco, and found the engine unit had a problem, in that it would not self start. Wear had taken its toll on the cylinder glands (and my thanks to the help received from other site readers who helped me in dismantling the cylinders), and this wear was allowing the pistons to jam in the bore at bottom dead centre. To cut a long story short, to make sufficient space to fix the glands I needed to increase the length of the engine by 10mm. You can see the aluminium spacers that I used in the photos. This was a complete success, and the engine was now self starting.
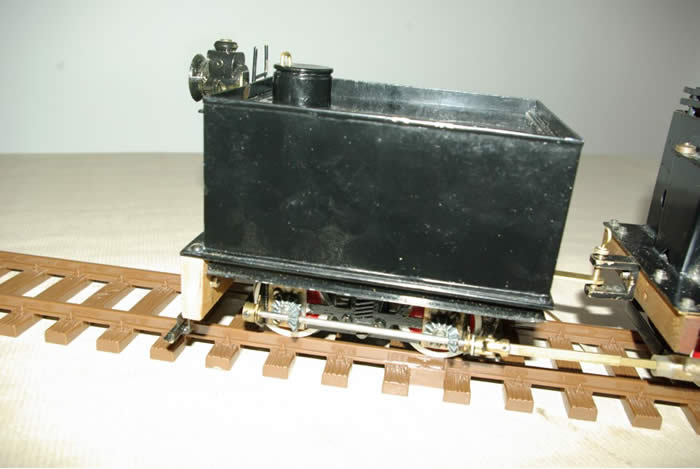
Next the tender was tidied up by the addition of a new drawbar. The gas tank needed a linkage from the servo, which is not the neatest, but it will do for the moment.
Next was water topping up arrangements. You can just make out the brass goodall valve that connects to a bush in the boiler backhead, which also has a 4mm filler pipe commercial fitting attached to it. That extra fitting holds securely the standard 4mm top up pump bottle pipe while the boiler is being topped up, and when you’ve finished, you just push the blue end to release the pipe. I find it makes the whole top-up process much easier!
Finally, all the servos were connected and places found in the tender for the receiver, switch and rechargeable batteries.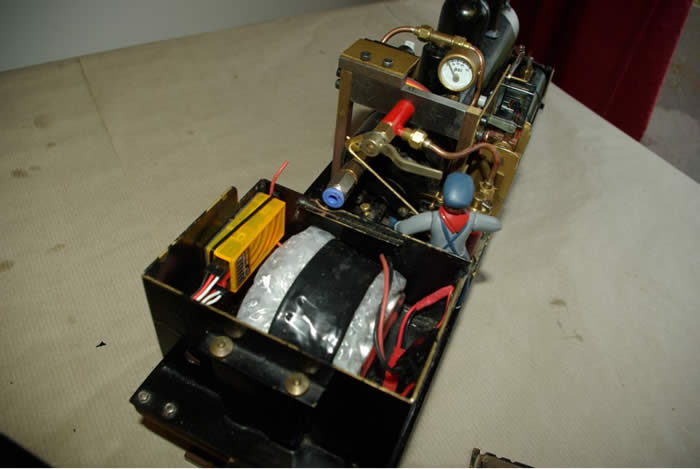
Next it was the turn of the driveshafts, which were quite easy as the universal joints and the brass square tubes were all to hand, and the loco was carefully tested on my reverse curve test track to check that there were no “fouls asthe loco took the curves.

Incidentally, the rear water truck did some amazing things during this last check! It’s difficult to describe, but at times the top water tank turns in the opposite direction to the wheeled truck underneath, and it looks very odd indeed!
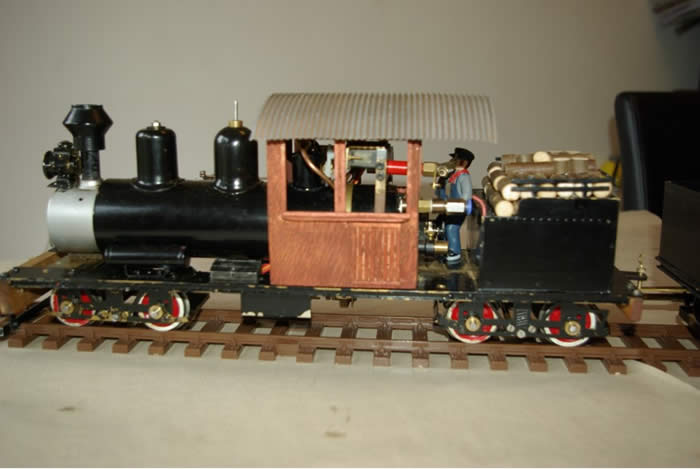
Finally, a “corrugated iron” roof was added to the cab, and I can report that real Evostick does a great job in holding it down!
I look forward to giving its first run under my ownership, when possible. It’s been a fascinating exercise restoring this fascinating locomotive. In particular, I would like to thank Lyndon Smith for correctly suggesting how the Osmotor cylinders should be dismantled.
DR June 2020