
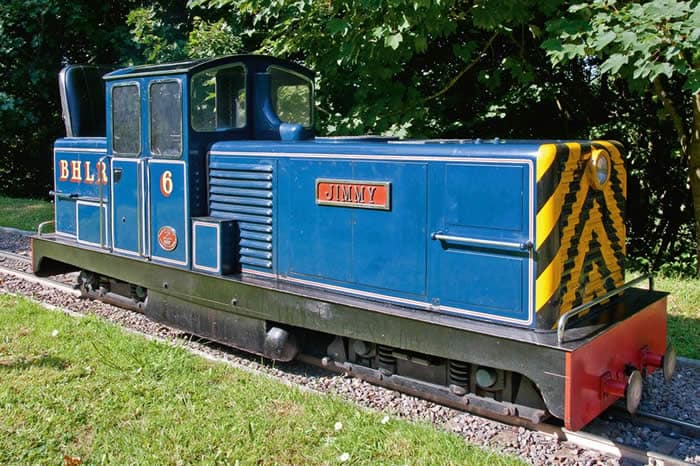
I first saw ‘Jimmy’ in a 2001 edition of Garden Rail magazine, in an article featuring Pecorama in Devon. I found out that it was a 7¼” diesel-hydraulic locomotive built by Severn-Lamb in 1986. Something about the loco sparked my interest and made me want to have a model of it.
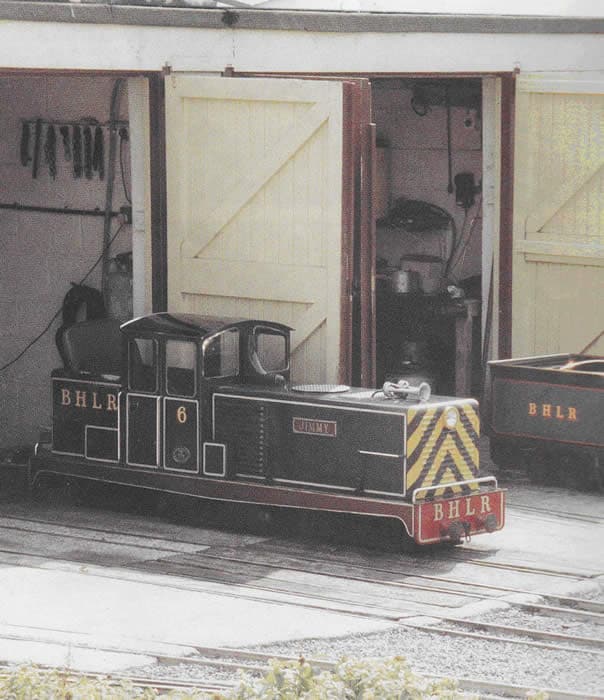
Some years later, when I had joined the 16mm Association and built a few simple kits, I made a half-hearted attempt to model ‘Jimmy’ using a fixed chassis and a flimsy wood and plastikard body. Needless to say, that idea didn’t last long. I later bought a small 0-4-0 shunter loco which was painted in a similar livery, but I soon realised that I wasn’t going to be satisfied until I made an accurate model using scale drawings. Returning from Peterborough one year, I decided to try my luck and call Pecorama in the hope that I could find out some basic information about the prototype. To my surprise, the ‘phone was answered by the company director who not only found out all the information I wanted, but sent me copies of the original engineering drawings as well. Later in the year, I accepted his invitation to view the loco in person, and took many photos as well as several pages of notes and sketches.
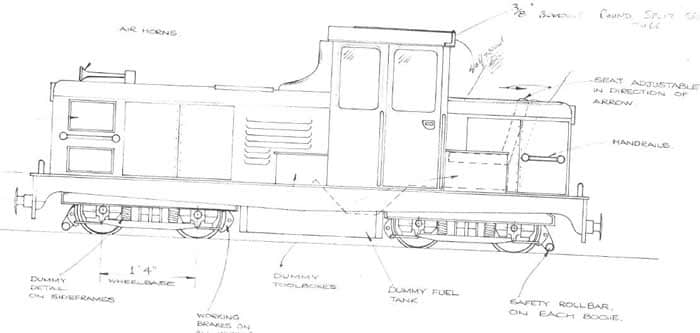
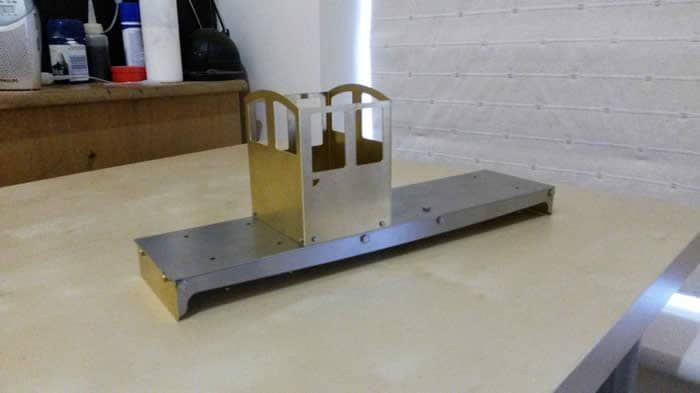
As I now had everything I needed to make a start, I set about designing the chassis using the scaled engineering drawings, and soon realised that I’d need to find a pair of motor bogies to drive the loco. I contacted a firm in India who assured me that they’d be able to make the bogies I wanted at a reasonable price. I foolishly handed over the money, and it will suffice to say that the goods never arrived. In the meantime, I continued to design the loco piece by piece using CAD software. I soon had a pair of laser-cut steel frames which I assembled to brass spacers to form the basic chassis. The footplate was made from 1mm steel and screwed to the frame spacers. I next designed the cab, which was laser cut from 1mm brass. Two ¼” square brass rods were machined and used to hold the four cab panels together, then the assembly was soft soldered. The completed cab locates into two slots in the footplate.
I was very interested in 3D printing at the time, and I used the CAD software to design the bonnets which I then had ‘printed’ in white resin. I was impressed with the parts, but I soon realised they would be too flimsy and needed quite a lot of sanding to look good.
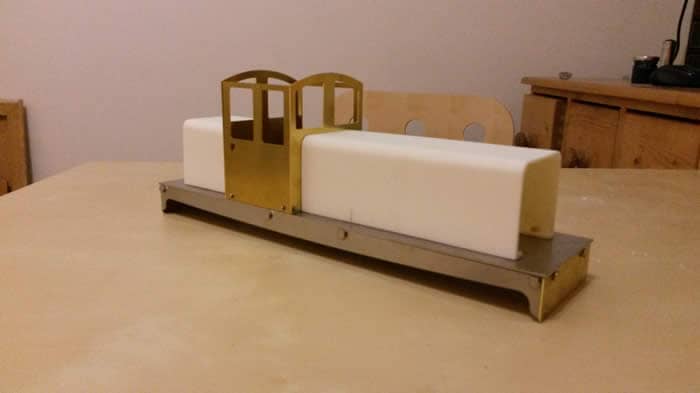
Meanwhile, despite numerous e-mails, communication from the Indian company stopped, and I began to lose interest in the project. An inspirational ‘phone call from my Dad encouraged me to keep going, and a pair of bogie kits were ordered from Swift Sixteen. The kits were soon painted and assembled, and the bogies were fitted to the chassis, with a large square hole being cut in the front of the footplate for the motor. I used 5mm thick acrylic discs fitted between the footplate and the bogies to allow them to pivot.
I was still unhappy with the 3D printed bonnets, so I decided to remake them from 1mm brass sheet which was formed to a U shape in a simple jig. Holes were drilled for handrails, and lengths of ¼” brass rod were tapped with M3 holes at various points. These were then soldered inside the bonnets, and this allowed the assemblies to be screwed to the footplate from the underside.

At this point, several of the main components were complete, but a lot of smaller parts still needed making. The buffer beams were made from brass, filed to profile, and drilled for IP Engineering centre buffers. The cab roof was made with Andy’s help, and the side boxes were machined from steel bar on the lathe. 3D printing was used to make the exhaust, fuel tanks, louvres and control panel. All of these parts were designed using the CAD software, and in the end I had a more or less complete 3D model which I could use for reference.
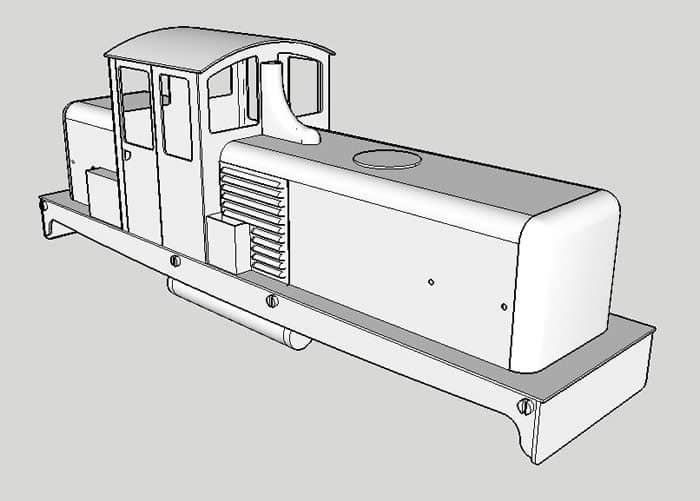
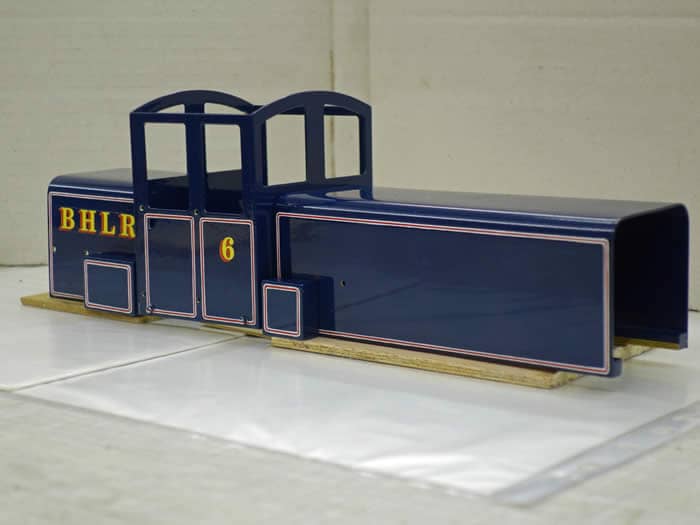
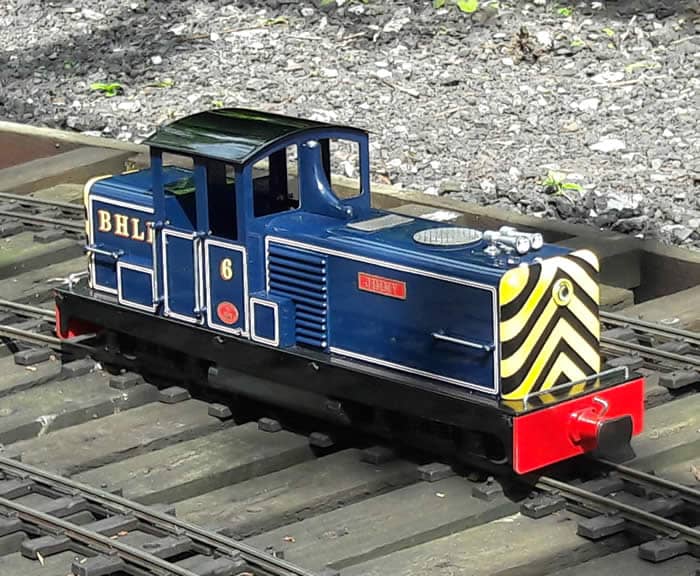
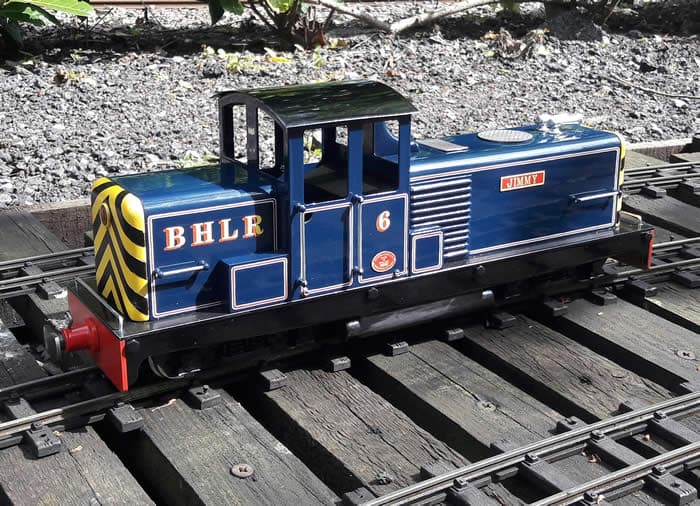
The front and rear radiators were challenging to make, as they have a rounded edge on 3 sides, and it was crucial to have 8mm radius corners to match the curves on the bonnet. A few methods were tried, including 3D printing, but the final solution was to make the panels from MDF. The edges to be profiled were routered with a suitable round-over bit. The next task was to apply wasp stripes to the panels, and although I tried to do the job myself, it proved too difficult and the parts were sent to Matt Towell at Barley Pit Works. He did a super job and once the parts were returned, I drilled a hole for the front headlight and glued the bezels into place. Now that most of the work on the superstructure was done, I decided that it was time to have the loco painted. This was done by an automotive painter who uses 2-pack car paint, and the finish is excellent. The superstructure parts were then handed over to Geoff Munday for lining, and needless to say, they came back beautifully lined in the same livery as the prototype. Geoff also applied custom decals which were supplied by CB Transfers.
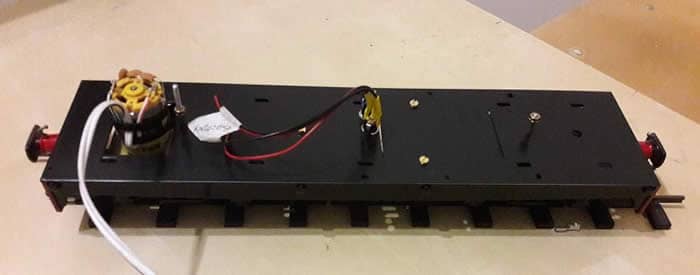
With the body parts painted and back in the workshop, it was finally time to assemble the loco, but not before I fitted the RC equipment. This was supplied by RC Trains and uses the Deltang system. I was really impressed with the small size of the receiver, and I really must find out how to add a sound card and lights. It took about half an hour to wire up the circuit, and while the installation isn’t the neatest job ever, it works very well.
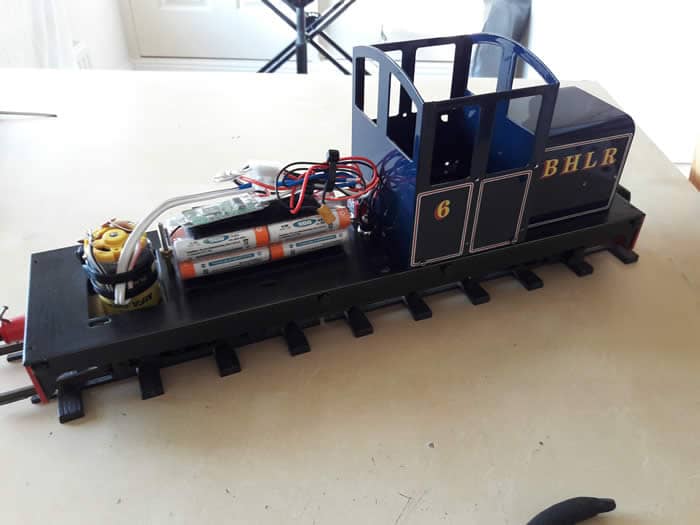
Once the body was fitted, the small details could be added, including handrails, air horns, and custom nameplates and works plates by Narrow Planet. The louvres were glued one by one onto L shaped pieces of plastikard, which were then painted and fitted into place. I would have liked to have added more detail to the cab, but by that time I was rushing to complete the loco in time for the MOTY competition at Peterborough. The model was completed on the day before the show, and although it didn’t win any prizes, I was proud to see my work on display.
The loco has since been run in on York Model Engineers’ garden railway, and it performs very well. It has received many positive comments, and I’m pleased to have built a faithful representation of the prototype from scratch.
April 2017